

.NET API Migration to Azure Kubernetes Service with Bicep & Azure DevOps ☸
At Nasstar, we recently achieved our Microsoft DevOps Specialisation which allows us to complete a DevOps Maturity Assessment for our customers. During these assessments, we work with customers to identify ways they can improve and implement best practice DevOps processes and modernise their technology stack.
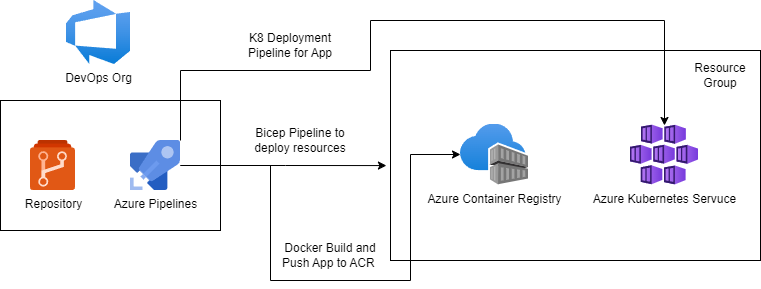
Working with a customer, we identified an opportunity to demonstrate the advantages that microservices and containerisation have and how using DevOps pipelines coupled with IaC to deploy AKS can lower costs, improve agility and reduce maintenance efforts. Kubernetes makes container orchestration a worry of the past, and all you really need to get going is a Dockerfile for your application.
This post will go over how using Azure Bicep and Azure DevOps Pipelines, we can deploy a sample ASP.NET application to Kubernetes. This example leverages Bicep Azure Verified Modules (AVM) for all Azure resources which is an amazing tool for deploying best practice Bicep code. It also uses a sample Microsoft ASP.NET application which can be found here. The method and code can easily be adapted for any application with a relevant Dockerfile. Being pretty new to K8s myself, it was a really cool project to work and hopefully start working with more!
All the code is available in my GitHub Repo 🙂
Step 1: Pre-requisites
To get started, there are a few items to get into place and also adapt in the code:
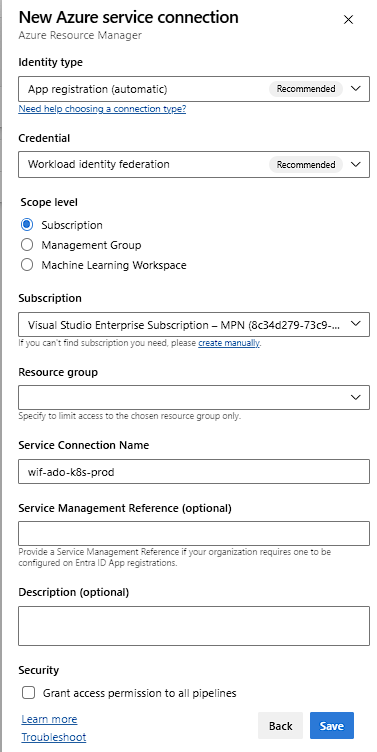
- Create a Service Connection wif-ado-k8s-prod between Azure DevOps and Azure:
- This can be done from your Azure DevOps Project Settings -> Service Connections -> Azure Resource Manager.
- Create a Workload Identity Federation to your Subscription which will be used for the Pipeline to deploy the Bicep IaC and Kubernetes deployment
- Assign the Workload Identity the Owner role on the Subscription
- Review and configure Bicep Parameters and Kubernetes Parameter Files to names of your choice:
- main.bicepparam
- main-k8s-pipeline.yaml
Step 2: Bicep Deployment
The Bicep code will deploy all the resources required to support the Kubernetes deployment using AVM modules. These are the Resource Group, Azure Container Registry (ACR) and Azure Kubernetes Service (AKS). I have implemented an initial what-if stage that is required to succeed prior to deploying the resources. All required role assignments are deployed via the AVM modules (a really nice feature within AVM modules).
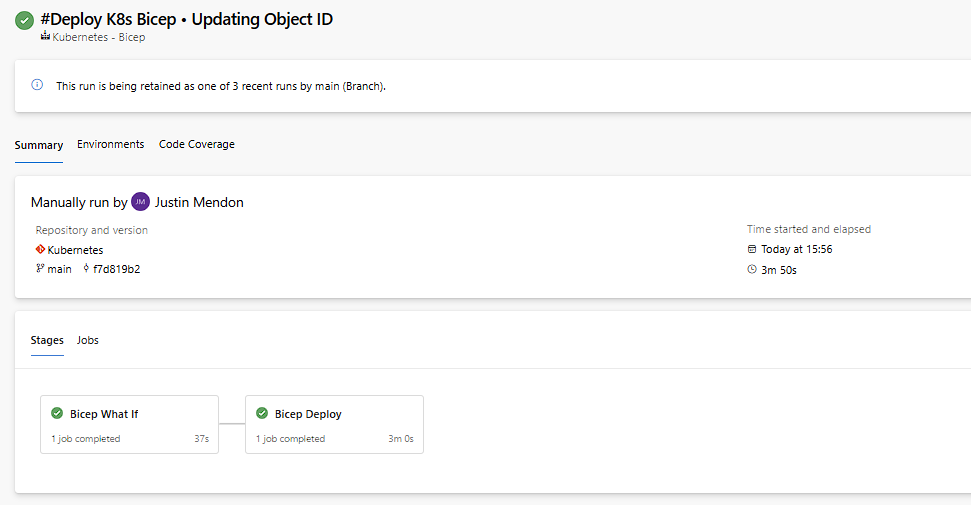
- Create a new DevOps Pipeline using main-bicep-pipeline.yaml
- Run the Pipeline to deploy all resources
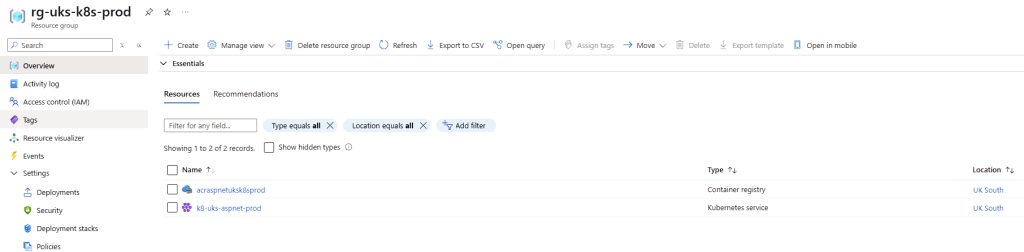
Once you’ve run the pipeline successfully, you should see all the resources deployed into your Azure subscription. These should be the Resource Group, Azure Kubernetes Service Cluster and Azure Container Registry:
Step 3: ACR – Docker Service Connection
Now that we have the Azure Container Registry deployed, we can set up a Docker Service Connection to the ACR that will allow the pipeline to Build, Tag and Push the Container Image to the ACR so that it can be used by our Kubernetes Cluster.
- Navigate back to Service Connections in your Azure DevOps Project
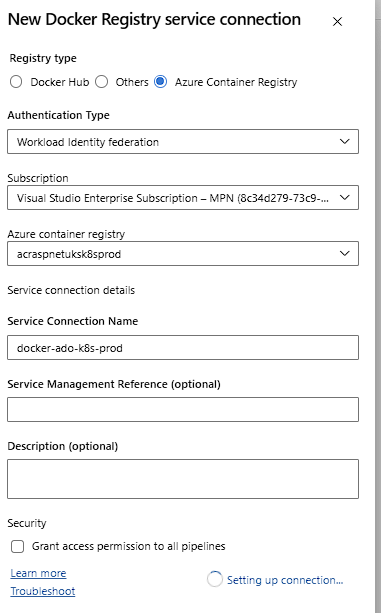
- New Connection -> Docker Registry -> Azure Container Registry
- Choose Workload Identity Federation
- Choose your Azure Subscription and Container Registry
- Name it: docker-ado-k8s-prod
Step 4: Docker Push and K8s Deployment
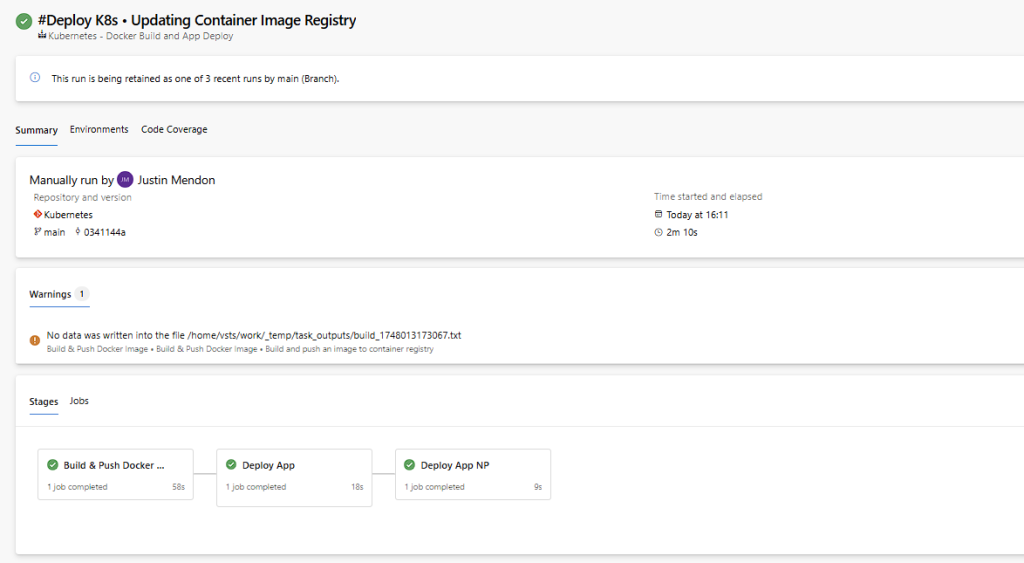
We now have all the resources deployed and all the relevant Service Connections in place that we can now deploy our Application to Kubernetes. This will happen in a few stages:
- Build & Push Docker Image – This will Build, Tag and Push the application code using the Dockerfile into the Azure Container Registry so that it can be used by the next stages.
- Deploy App – This will deploy the Container Image from the ACR to the Kubernetes Cluster.
- Deploy App NP – This will deploy the Load Balancer Service for the application above which will make it externally available via an Azure Public IP.
ACR and K8s Pipeline Setup
- Create a new DevOps Pipeline using main-k8s-pipeline.yaml
- Update Container Image reference in App-deploy.yaml
- Run the Pipeline to deploy all the stages
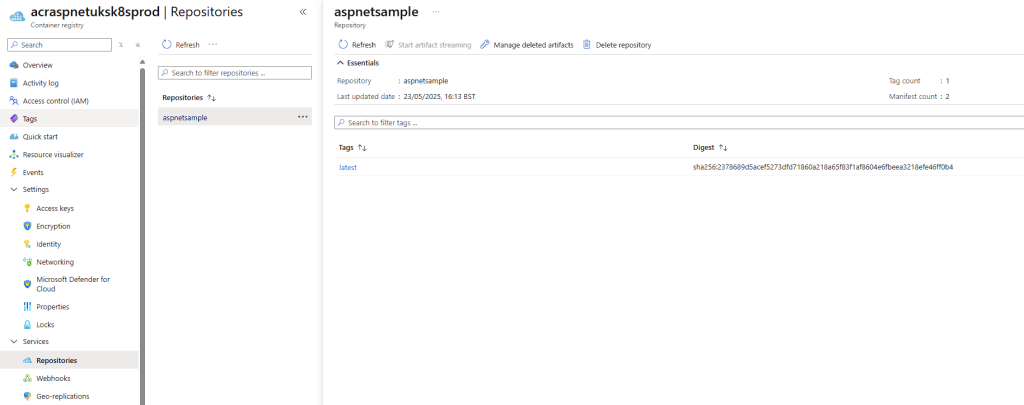
You should be able to see in your Azure Container Registry a new repository and your built container image tagged with latest:
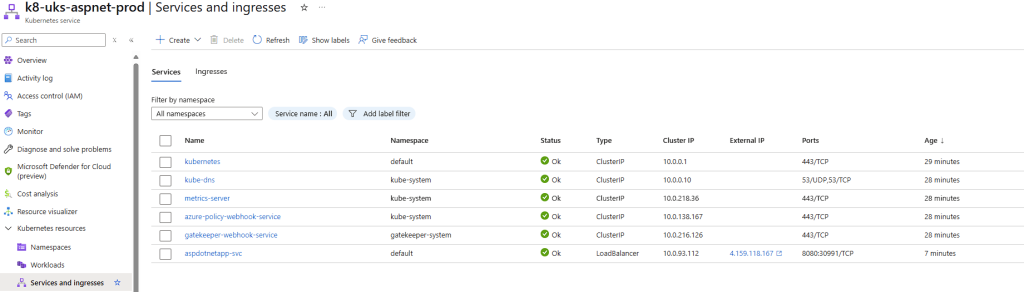
Assign yourself the Azure Kubernetes Service RBAC Cluster Admin RBAC role on the Kubernetes Cluster which will allow you to view all the Kubernetes Services. Navigating to Services, you should see your aspdotnetapp-svc running with the exposed external IP:
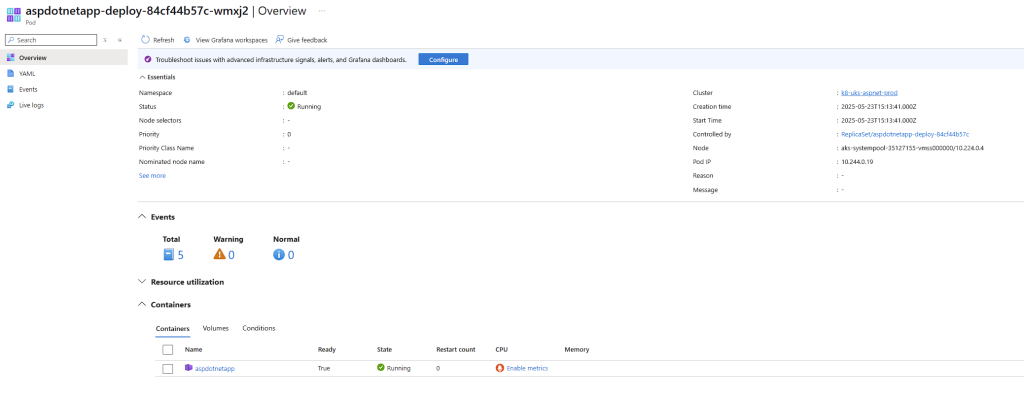
If we click into the Service -> Pods and press on the Pod, we can see that our aspnetapp container is up and running in that Pod:
Final Result and Summary
Navigating to the external IP that can be found in the Services Tab of the AKS Cluster should launch the ASP.NET application:
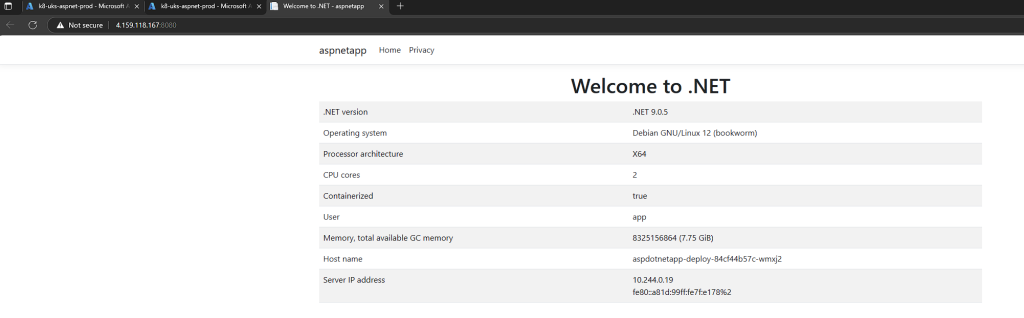
Success! We’ve deployed an Azure Kubernetes Service and Azure Container Registry using Bicep and Azure Pipelines. We’ve then configured a pipeline to Build, Tag and Push our ASP.NET Application to the Azure Container Registry and deploy the Container Image to Azure Kubernetes Service 😊
Hopefully this helps illustrate that Containerisation and Kubernetes are an attainable goal for dev teams to aim for and to get started with. Once there, you will soon realise the tonnes of advantages they offer over running on VMs!
Next Steps
This is a very simple implementation of deploying an application to Kubernetes and can be expanded in a few directions:
- Set the Pipeline Trigger to main or another branch and implement CI/CD for building the Application for any changes to a branch and deploying the changes to the cluster
- Leverage and setup more of the Kubernetes magic in Bicep – autoscaling, monitoring and more
- Work with a more complex application with multiple containers to tackle more of the networking, orchestration and management aspects of K8s
In the meantime, I will be cracking on trying to achieve Certified Kubernetes Administrator (CKA) certification!
If you have any feedback/advice on my post – please do let me know! I hope to share anything cool and useful I find within Azure 🙂

Nice share!